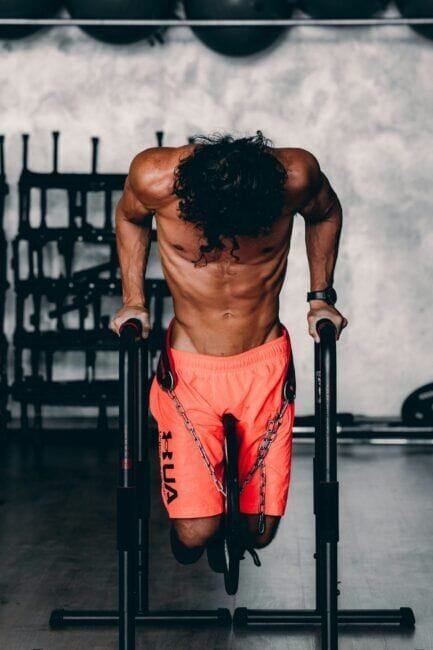
Imagine creating a muscular and jaw dropping physique without ever stepping foot in a gym! It’s not just possible, it’s highly effective. Calisthenics is the art of using your body weight as resistance, it has been proven to build impressive muscle mass and strength through bodyweight muscle building exercises.
In this guide, we’ll go through the top calisthenics exercises that will help you pack on muscle and transform your physique. Whether you’re a beginner or an advanced athlete, these exercises will challenge your body and stimulate muscle growth. Ready to make some gains with calisthenics? Let’s go!
Table of Contents
Push Exercises for Upper Body Muscle Growth
Standard Push-ups: The foundation of upper body strength
The push up tried a tested exercise that is great for working the chest, shoulders and triceps while also activating the core. Now there are many push up variations for chest growth, each targeting the chest a bit differently.
Place your arms shoulder width apart, keep your body straight from head to toe while lowering your chest to the floor or your elbows create a right angle with your forearm. I would also recommend keeping your elbows angled 45 degrees or less out from your body. As unnecessary flaring of the elbows up may lead to shoulder injuries. Push ups are great as there are just so many variations to make them easier or harder to perform.
Diamond Push-ups: Target your triceps for arm definition
Diamond push ups are very similar to the standard push up however your hands will be placed closer together with them directly under your chest. The diamond push up name comes from the shape of the gap between your thumb and pointer fingers when positioned on the ground. This form of push up is more difficult and will place more emphasis on your chest and triceps.
Pseudo Planche Push-ups: Build chest and shoulder mass
Pseudo planche pushups, (pronounced: sue-do planch) can be very difficult as you are leaning far forward and are in a position where you are using gravity and levers to make the exercise more difficult. The further you lean forward the more difficult the exercise gets. Perform these with your hands shoulder width apart. Then keeping your shoulder blades down and forward (protracted), you will lean forward slightly and then this will be your starting position for a push up. This really engages your shoulders and they are constantly working to keep you from falling forward.
Experiment which hand positioning works well for you based on your wrist. You can either have your fingers pointing directly forward or your hands turned outwards so your thumbs will be forward and your fingers pointing outwards. I prefer to perform these with my fingers pointing outwards as it provides less stress on my wrist when compared to having my fingers forward.
Dips: Develop your chest, triceps, and shoulders
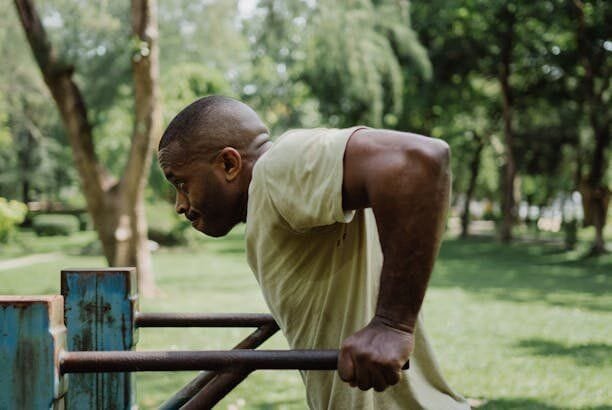
Nicknamed the upper body squat. This upper body exercise involves the chest (specifically the lower and mid chest), triceps and shoulders. Find parallel bars that are slightly wider than shoulder width apart. Start the exercise at the top, lowering your body down while still keeping your shoulders pushed up to your neck. Then at the bottom, press your body up and squeeze your chest at the top.
These have to be one of my favorite exercises and should be a staple in your workout plan. You can also easily add weight or find a low bar that you can use your legs to assist with the movement with.
Pike Push-ups: Progress towards handstand push-ups for shoulder gains
Some people think you can’t build great shoulders with calisthenics. I just ask them “How many handstand push ups can you do?..” And they go quiet.
We’ll need to work our way up to handstand push ups though. That’s why pike push ups are great to build strong shoulders and develop the strength to then work on handstand push ups.
To perform a pike push up, bend down and place your hands on the floor slightly wider than shoulder width apart. While trying to keep a straight line from your hands to your hips, lower your head to the floor and then press back up squeezing with your shoulders.
There are many variations of the pike push up to make it easier or harder depending on your level. To make the exercise easier you will want to place your hands on a surface or bar that is higher than the ground. And to make the exercise harder, you can place your feet on a surface or bar that is higher than the ground.
Pull Exercises to Build a Muscular Back and Arms
Pull ups: The king of back exercises
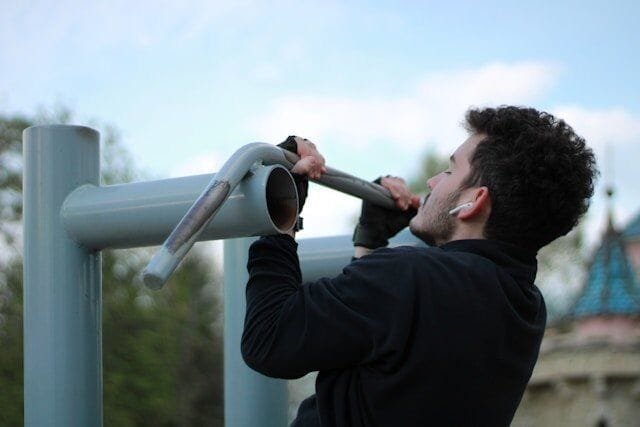
This beast of a movement is often called the king of back exercises, and trust me, it lives up to all the hype. Grab the bar with an overhand grip, hands slightly wider than shoulder width apart, and prepare for a challenge. From a dead hang, pull your entire body up until your chin clears the bar.
Sounds simple, right? Well, it’s anything but easy. Pull ups primarily target your lats, giving you that v shape taper, but they also work your biceps, forearms, and even your core. Here’s a pro tip: focus on pulling with your back, not just your arms. Imagine squeezing a pencil between your shoulder blades as you pull up. And for the love of gains, don’t swing or use momentum, that’s cheating, and you’re only cheating yourself. If you need to start with negatives or use resistance bands for assistance.
As you get stronger, you can progress to different variations like wide grip, close grip, or even the holy grail… one arm pull ups. Trust me, once you master pull-ups, you’ll feel like a true calisthenics beast, and your back will thank you for it.
Chin-ups: Focus on bicep development
Chin ups, while being similar to pull ups, have a greater emphasis on the biceps. Instead of the overhand grip you use for pull ups, you’ll be using an underhand grip, palms facing towards you. This simple change puts a greater emphasis on your biceps, giving them a run for their money. Start by grabbing the bar with your hands about shoulder width apart, then pull yourself up until your chin clears the bar. Lower yourself back down with control and no dropping like a sack of potatoes!
While your biceps are getting a serious pump, don’t forget your back is still putting in work. Your lats, in particular, are still very much involved in this movement.
One thing to watch out for: don’t let your elbows flare out to the sides. Keep them close to your body as you pull up for maximum efficiency and to protect your shoulders. If you’re finding full chin ups tough (and let’s be honest, they are), you can start with negatives or use a resistance band for assistance.
As you get stronger, try mixing up your grip width or even attempt some weighted chin ups. Before you know it, you’ll be sporting some impressive guns and a back to match!
Australian Pull-ups (Inverted Rows): Perfect for beginners and back thickness
There are many names for this exercise. Whether that be: Australian pull ups, inverted rows or bodyweight rows. They are all the same exercise. To perform these, you’ll need a bar set at about waist height. Lie underneath it, grab the bar with an overhand grip with your hands slightly wider than shoulder width, and extend your body so you’re in a straight line from head to heels. Now pull your chest up to the bar, squeezing your shoulder blades together like you’re trying to crush a walnut between them. Lower yourself back down with control, and that’s one rep! These primarily target your upper back muscles, helping you build up your back thickness.
You can easily adjust the difficulty by changing your foot position. Feet flat on the ground is easier, while feet elevated on a bench or box will put more weight on your arms to row. These can also be performed on a set of gym rings to provide for a more neutral grip allowing the wrists complete freedom of movement.
Muscle-ups: Combine pulling and pushing for advanced gains
Muscle ups are definitely a milestone of calisthenics. I remember the first muscle up I got very clearly and I was excited for days after as the training had paid off. It is a feat of strength which implements both pulling and pushing movement. You will want to have trained explosive pull ups as it is not good enough to just be able to do lots of reps. You will need to pull yourself up explosively.
Start by hanging from a bar with an overhand grip, slightly narrower than shoulder width. Now, here’s where the magic happens: you’re going to pull yourself up explosively, not just to chin level, but high enough to get your chest to the bar. Now in one smooth motion, you’ll transition over the bar and press yourself up until your arms are fully extended. Sounds simple, right?.. This move requires you to have an explosive pull up, good timing and be proficient with straight bar dips.
It’s a full upper body workout in one rep, hitting your back, chest, shoulders, and arms like nothing else. I recommend starting with negative muscle ups or use resistance bands to build up the strength and technique. This helps you get familiar with the movement pattern.
For the timing, it can help to start at the bottom with a little bit of swing and you will want to pull explosively just as your body starts to swing back. You can also add a bit of kipping to help assist your first few reps by driving your knees towards the bar.
Once you nail your first muscle up, you’ll feel like you’ve unlocked a secret level in the fitness game. Just try not to grin too much when you bust these out at the park.
Front Lever Progressions: Build core strength and back definition
The front lever is a gravity defying calisthenics static hold which shows great core and lat strength. The full front lever involves hanging from a bar and extending your body horizontally, parallel to the ground, like you’re planking in mid air.
For front lever progressions, you can start with a tucked lever and slowly work your way up by extending your legs, one at a time and then both into a straddle position. I find it is best to stick with heavy weighted pull ups to build up the foundational strength and then once you can do weighted pull ups with 30kg. You can try and do front lever negatives or try to get as high as you can. This is a more efficient way as you are building up your base strength first and then practicing for the skill itself.
Leg Exercises for Lower Body Muscle Development
Bodyweight Squats: Build foundational leg strength
Bodyweight leg exercises are an important part to ensure you have a well rounded physique. Bodyweight squats are a tried and tested exercise that is great for working the quads, hamstrings and glutes. Stand with your feet shoulder width apart with your toes pointing slightly outward. Then lower your body by pushing your hips back and bending your knees, keeping your chest up and your knees over your toes. Aim to get your thighs parallel to the ground or lower if possible while keeping your back straight. Now push through the middle of your foot tensing your quads and glutes to stand back up.
I would also recommend keeping your knees in line with your toes to avoid unnecessary stress on your joints. Bodyweight squats are great as there are just so many variations to make them easier or harder to perform.
Pistol Squats: Challenge balance and build single-leg power
Pistol squats are a more advanced variation of the bodyweight squat that really challenges your balance and single leg strength. To perform a pistol squat, stand on one leg with the other leg extended in front of you. Lower your body on the standing leg, keeping your extended leg off the ground. Try to lower yourself until your butt nearly touches your heel, then stand back up. This exercise primarily targets your quads, hamstrings, and glutes, but also engages your core and ankle stabilizers.
If you’re finding full pistol squats challenging, you can start with assisted versions using a chair or door frame for support. As you progress, you’ll be able to perform these freestanding, demonstrating impressive single leg strength and control. A little tip to balance is to keep your arms out in front of you as this places weight further forward. If you are struggling to go down but believe you have the strength. I’d recommend you try stretching your ankles so your knee can go forwards during the pistol squat easier.
Jump Squats: Develop explosive strength and muscle
Jump squats are a plyometric variation of the bodyweight squat that helps develop explosive power in your legs. Start in a regular squat position, but instead of simply standing up, explode upwards and jump as high as you can. Land softly and immediately sink into the next rep.
This exercise is great for developing fast twitch muscle fibers and improving overall athletic performance. Jump squats will really get your heart rate up, making them an excellent addition to both strength and cardio workouts. To make the exercise more challenging you can add weight, increase the depth of your squat before jumping or have this right after a set of bodyweight squats.
Bulgarian Split Squats: Target quads and glutes effectively
Bulgarian split squats are an excellent unilateral exercise that really targets your quads and glutes. Start by standing a couple of feet in front of a bench or chair. Extend one leg behind you and place the top of your foot on the bench. Lower your back knee towards the ground, keeping your front knee tracking over your toes. Push back up through your front heel to return to the starting position. This exercise is great for exposing and correcting any imbalances between your legs. You can make it more challenging by holding dumbbells or a barbell. Remember to keep your torso upright and your core engaged throughout the movement.
Calf Raises: Don’t forget those lower legs!
Calf raises are a simple yet effective exercise for building those lower leg muscles. Find a step or a curb and stand with the balls of your feet on the edge, heels hanging off. Rise up onto your toes as high as you can, then lower back down until you feel a stretch in your calves. Really try and get as much stretch as possible. To make the exercise more challenging, you can perform the calf raise with just one leg at a time or you can do it weighted.
You can also vary the position of your feet by having your toes pointing in, out, or straight ahead to target different parts of your calf muscles. Incorporating calf raises into your routine will help build lower leg strength and improve your overall leg aesthetics.
Core Exercises for a Sculpted Midsection
Hanging Leg Raises: Target lower abs and build core strength
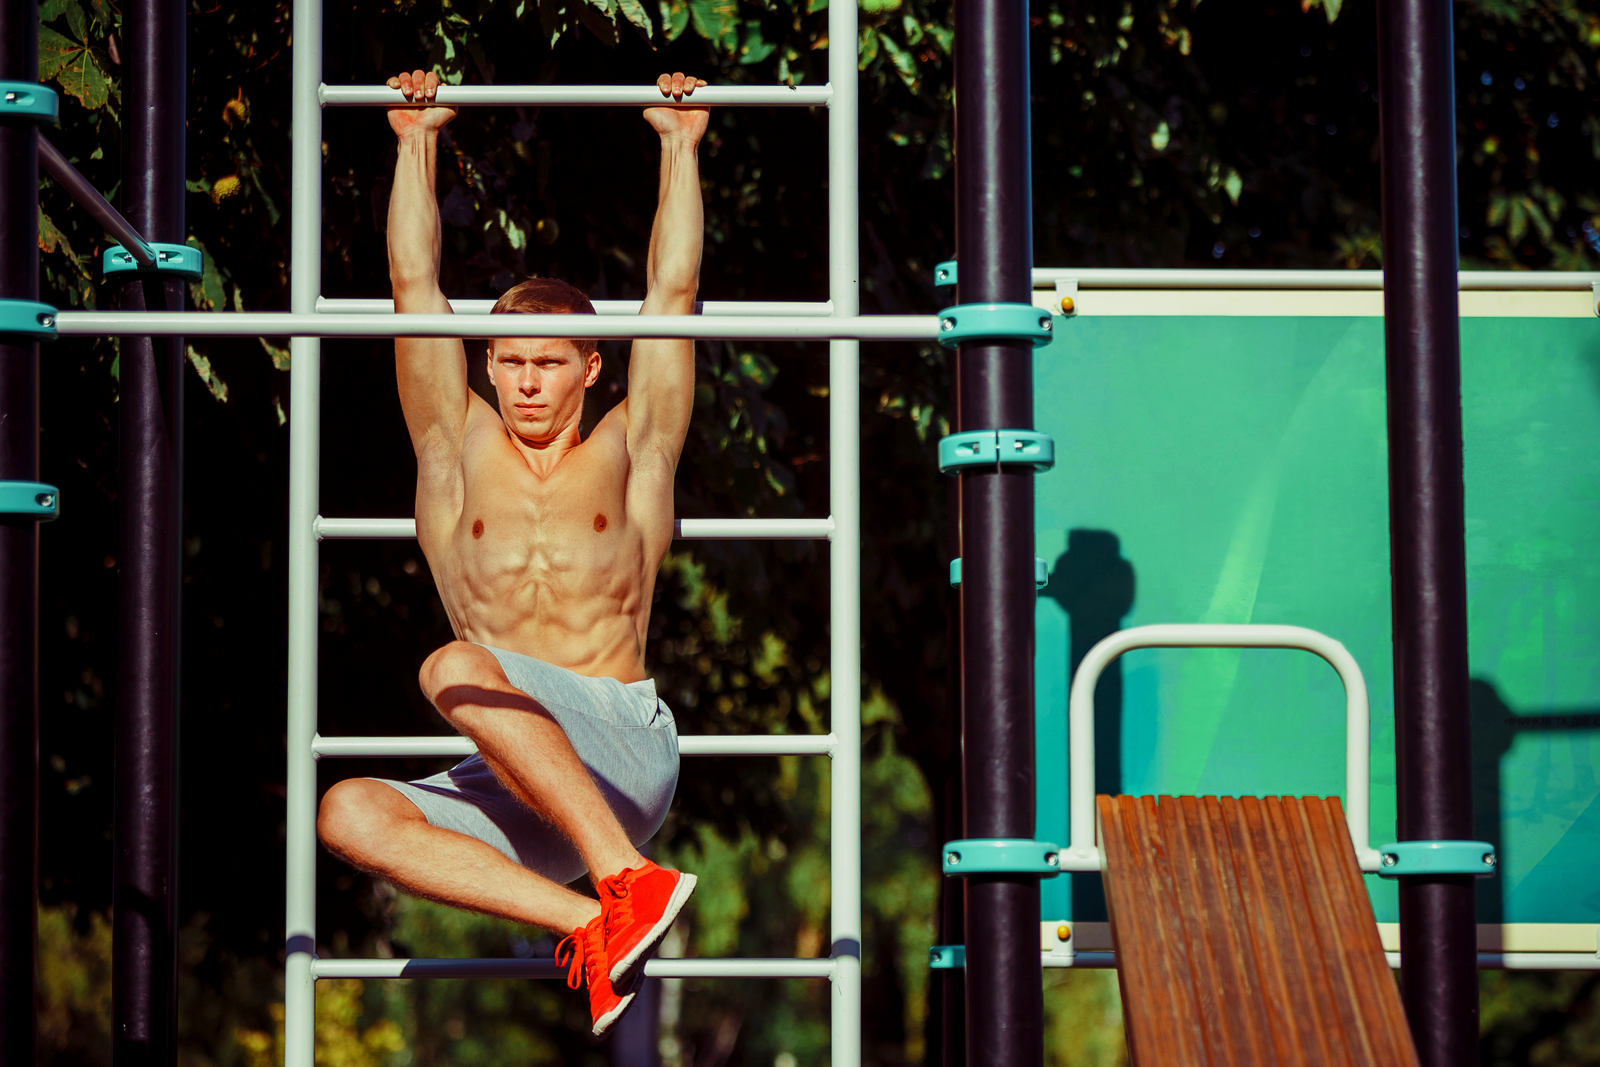
Hanging leg raises are a fantastic exercise for targeting your lower abs and building overall core strength. Start by hanging from a pull up bar with an overhand grip and your hands slightly wider than your shoulders. Keep your arms straight and your shoulders engaged to protect them. While keeping your legs straight, raise them until they’re parallel to the ground (or higher if you can). Lower them back down with control, and that’s one rep.
This exercise requires not just core strength, but also grip strength and hip flexor engagement. If you’re finding the full version too challenging, you can start with bent knee raises and progress from there. As you get stronger, you can try to touch your toes to the bar for an extra challenge. Remember to avoid swinging and use controlled movements throughout. A helpful tip: to help prevent unwanted swinging, I recommend performing the movement slower and more controlled. After a while you will get used to it and your shoulders will help keep you still.
L-Sit Progressions: Develop incredible core and arm strength
The L-sit is a static hold that looks deceptively simple but packs a serious punch when it comes to building core and arm strength. The full L-sit involves sitting on the ground with your legs extended straight out in front of you, parallel to the floor, while supporting your body with your hands on the ground. To work up to a full L-sit, start with supported versions using parallettes or books.
You can begin with tucked legs, then progress to one leg extended, and finally both legs out. Focus on pushing down through your hands while keeping your arms straight, and lifting your hips off the support. Even holding for a few seconds is a win when you’re starting out. As you progress, aim to increase your hold time. Before you know it, you’ll be defying gravity and impressing everyone at the gym with your floating skills. If you are finding your legs too tight, try to put some time into stretching out your hamstrings and lower back as this may be preventing your from achieving the L-sit.
Dragon Flags: Bruce Lee’s favorite for a reason
Dragon flags were famously championed by Bruce Lee and are not for the faint of heart. This advanced core exercise will have your entire midsection screaming, but the results are worth it. To perform a dragon flag, lie on a bench and grip the edge behind your head. Lift your entire body off the bench, keeping it straight from your shoulders to your toes, until you’re balanced on your upper back and shoulders. Then, lower your body back down as slowly as you can, keeping it rigid throughout the movement.
The key is to resist the pull of gravity and maintain that straight body position. This exercise hits every part of your core, from your lower abs to your obliques, and even works your chest and back muscles as stabilizers. If you’re new to these, you can start with just negatives and build up your strength from there.
Plank Variations: Build overall core stability and endurance
You’ve most likely tried to compete with your mates about who can hold the plank the longest and felt the burn. It’s a great exercise for building core stability and endurance. The basic plank involves holding a push up position with your forearms on the ground with your body straight from head to heels. The beauty of planks is their versatility. Once you’ve mastered the basic plank you can spice things up with variations. Try side planks to target your obliques, or plank jacks to add some cardio.
Remember, quality over quantity a 30 second plank with perfect form is better than a 2 minute plank with your hips sagging. Keep your core tight and your glutes squeezed, and also don’t forget to breathe. Your abs might be on fire, but think of it as forging them in the flames of a stronger core.
Russian Twists: Develop obliques for a complete core
Russian twists are great for targeting those often neglected obliques for a balanced muscular core. To perform this exercise, sit on the ground with your knees bent and feet lifted slightly off the floor. Lean back slightly, keeping your back straight until you feel your core engage. Now, twist your torso from side to side then touch the ground beside your hips with both hands. Each twist to one side counts as one rep. To make it more challenging, you can hold a weight or medicine ball as you twist.
The key here is controlled movement, don’t just flop from side to side like a fish out of water. Really focus on rotating from your core, keeping your legs steady, and breathing steadily throughout while tensing your obliques. You can also lift your feet higher off the ground for an extra balance challenge.
Compound Movements for Full Body Muscle Stimulation
Burpees: Engage multiple muscle groups and boost metabolism
Burpees… The exercise everyone loves to hate. This full body movement is like a high intensity combination of a push-up, squat, and jump all rolled into one and can be a great exercise to put into your full body calisthenics workouts. Start standing, then drop into a squat position and place your hands on the floor. Kick your feet back into a plank position, then do a push up, then jump your feet back to your hands. Finally, explode upwards into a jump with your hands over your head. And that’s just 1 rep!
Burpees engage nearly every muscle in your body and send your heart rate through the roof, making them excellent for building strength, endurance, and boosting your metabolism. They’re also a great calorie burner. Start with a few reps and build up over time. Before you know it, you’ll be knocking out sets of burpees like a champ. Just don’t expect to love them any more than when you started.
Mountain Climbers: Build core strength and shoulder stability
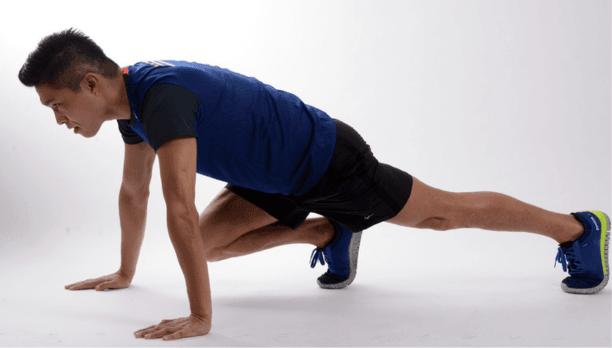
Mountain climbers are like running in place, but with the added “bonus” of being in a plank position. Start in a high plank position, hands directly under your shoulders. Now, bring one knee towards your chest, then quickly switch and bring the other knee in, as if you’re running horizontally. Keep your core tight and your hips low. The faster you go, the more of a cardio workout you’ll get, but don’t sacrifice form for speed. This exercise is fantastic for building core strength, improving shoulder stability, and getting your heart rate up.
Bear Crawls: Develop full body coordination and strength
Start on all fours with your hands under your shoulders and knees under your hips. Lift your knees slightly off the ground, then move forward by simultaneously moving your right hand and left foot, followed by your left hand and right foot. Keep your back flat and core engaged throughout the movement. Bear crawls will help to improve shoulder stability, and work your core in a dynamic way. They also help with proprioception, which is a fancy way of saying “knowing where your body is in space.”
Start with short distances and build up over time. If you want to make this even harder, you can attempt doing push ups each time you move your legs forward.
Handstand Push ups: Ultimate shoulder and core developer
Think regular push ups are tough? Meet their upside down, overachieving cousin: the handstand push up. This exercise is the ultimate test of shoulder strength and core stability and balance. Start in a handstand position against a wall. Lower your head towards the ground by bending your arms, then push back up to the starting position. This move primarily targets your shoulders and triceps, but your entire core has to work overtime to keep you stable.
If you’re new to this, start with pike push ups or wall walks to build up the necessary strength and balance. As you progress, you can try to lower deeper or even attempt them without wall support (just have a spotter nearby, unless you enjoy face planting). Master these, and you’ll have shoulders that could put Atlas to shame. You’ll definitely get a few looks if you do these at the park.
To help learn how to balance, start with learning how to consistently kick up. Then aim to have half of your handstands fall forward and the other half backwards. Keep your core really tight and feel like you are grabbing your hand. Try to balance by either pushing your fingers down or by raising them up.
Progressive Overload Techniques for Continuous Muscle Growth
Increasing repetitions: Build endurance and stimulate growth
Increasing repetitions can be used to progressively overload your exercises and workouts. Unless you are specifically training for endurance, try and keep your repetitions between 8 – 20 reps. Once you can complete the first set with over 20 reps, I’d suggest you choose a more difficult exercise.
This principle involves adding 2 reps to each set on every exercise compared to your last workout. Aim for at least 2 reps and then note down your achieved reps and repeat the process.
My favorite progressive overload formula is by combining an increase in repetitions followed by an increase in weight. Add 2 reps until you can perform 20 reps on the first set, then add 5kg or pick the next progression. This is a bullet proof method for progress!
Adding weight: Use weighted vests or backpacks for extra resistance
Calisthenics is often about muscle growth without weights. You can however utilize the use of extra weight, whether that be in the form of a weighted vest, weighted belt, backpack with water bottles or weights in it. Any way that allows you to predictability add weight to ensure that the exercise is hard enough within the desired rep range. Before I ever had a weight vest, I used to fill a backpack full of water bottles. I don’t know why we had so many water bottles, however it worked to my advantage and allowed me to perform weighted dips, weighted pull ups and weighted push ups with minimal equipment.
Slowing tempo: Increase time under tension for muscle development
Slowing down the tempo of the exercise makes the exercise much more difficult as the muscle has tension on it for a longer period of time. This can be a great way to increase difficulty and really feel the muscle activating by focusing on the squeeze and performing slower reps.
Let’s use the push up as an example. Instead of bouncing up and down, try to take around 3 seconds to lower yourself down, hold for 1 second at the bottom, then take 3 seconds to push back up. Suddenly, that set of 10 push ups feels like 100, and your chest is screaming at you! You can apply this to nearly any exercise and can be a great way to do a self check on your own form and ensure you are performing the exercise correctly.
Decreasing leverage: Make exercises harder by changing body position
This is what calisthenics is known for. All of the crazy moves that people can do with their body weight against gravity. You can use gravity to your advantage to build muscle and make exercises more difficult overtime. This principle can be applied to a lot of the foundational exercises such as: Australian rows and push ups.
Take the humble push up, for example. Start with your feet on the ground, and you’re battling about 60% of your body weight. Elevate those feet on a chair, and suddenly you’re pushing closer to 70%. Put your feet up on a wall, and you’re in handstand push up territory, fighting against nearly all of your body weight. It’s like adding weight plates, but the only thing getting heavier is your respect for gravity.
Australian rows follow the same principle. Begin with your body more vertical, and it’s a walk in the park. Lower that bar (or raise your feet), and suddenly you’re in Struggle Town, population: you. The more horizontal your body, the more of your weight you’re pulling, until you’re eventually doing full front lever rows and questioning your life choices.
Combining movements: Create supersets for increased muscle fatigue
If you are wanting to do a workout in less time while getting a cardiovascular workout in. You can plan a superset into your workout. A superset is when you perform an exercise right after another with no rest. These are typically paired as opposing exercises one after the other. For example, you perform push ups directly after a set of pull ups. This will result in your body pumping blood to all of the muscles being worked while allowing a momentary rest for each group of muscles.
If you’re feeling like you want to really feel your chest burning, try a set of dips immediately followed by a set of push ups. But don’t be surprised if you can’t perform as many reps as usual. Your chest, shoulders and triceps will definitely feel the pump!
Conclusion:
Here’s our list of some of the best calisthenics exercises to build muscle across your entire body! Remember, the key to muscle growth is consistency, proper form, and progressive overload. Start with the exercises that match your current calisthenics strength level and gradually work your way up to more challenging variations.
As you use these exercises into your routine, listen to your body and give yourself enough rest for recovery and growth. If you stay consistent over time, you’ll soon see impressive gains in muscle mass and strength, all achieved with the power of your own body weight.
Ready to transform your physique with these muscle building calisthenics exercises? Your journey to a stronger, more muscular you starts now. Stay strong!

Founder of www.calisthenics-101.co.uk. Training calisthenics since 2012.
Currently working on: 30 second one-arm handstand, muscle-up 360, straddle planche.

